Backups
Managing backups for PVE or a Linux server
Create a Backup Job (PVE)
Before You Start
Proxmox Virtual Environment Root/Admin access on web page
Onboarding email with PBS hostname, encryption key, fingerprint, username and password
Steps
If you connected your backup server using the installation script, then you do not need to setup a job unless you would like more than one.
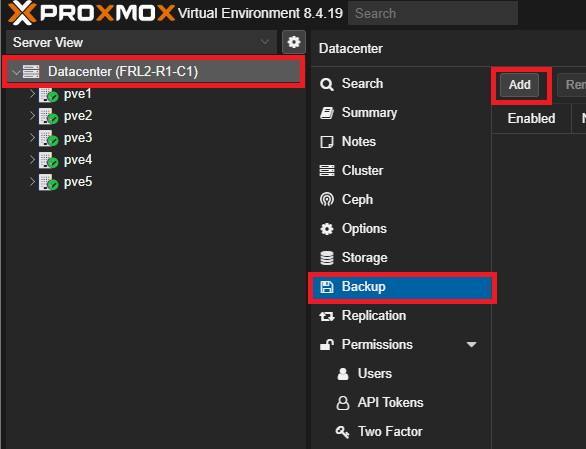
First, login to your Proxmox VE and go to Datacenter > Backup and hit Add.
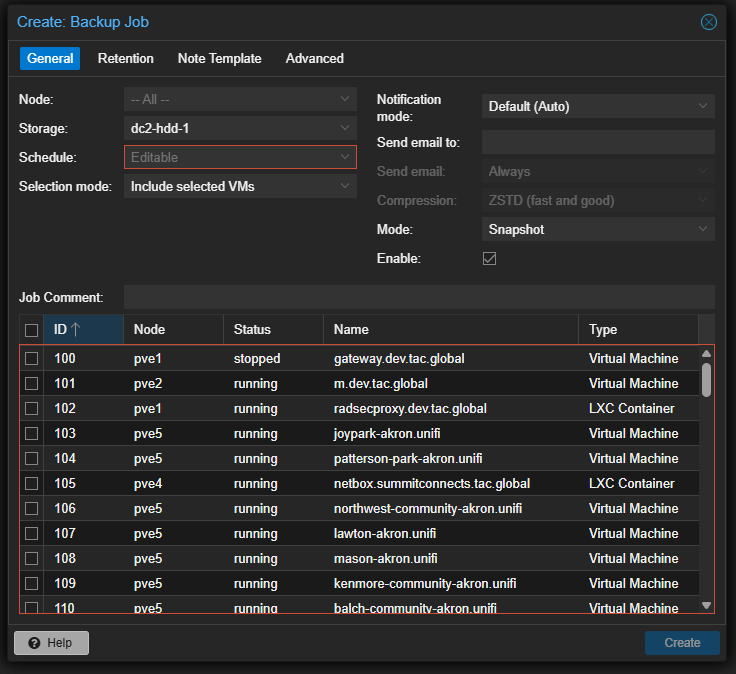
Under General, choose which nodes you'd like to backup from, the schedule the job should run and which emails the job sends notifications to and any job comments. You can specify which virutal machines/containers get backed up to the Proxmox Backup Server, but you must select at least one to proceed.
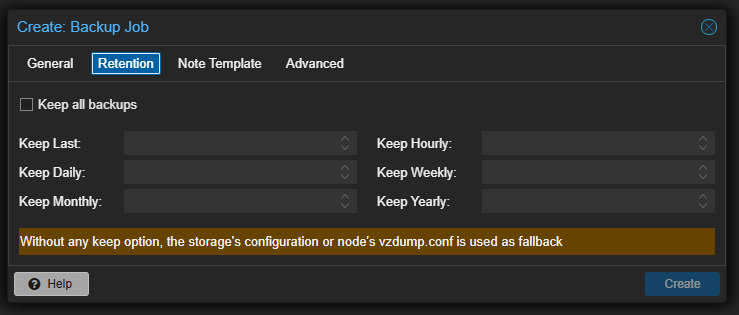
Under Retention, you can determine how long backups are kept. The rules stack so backups can be kept if multiple rules are true at once. If you need a guide for retention policies, go here.
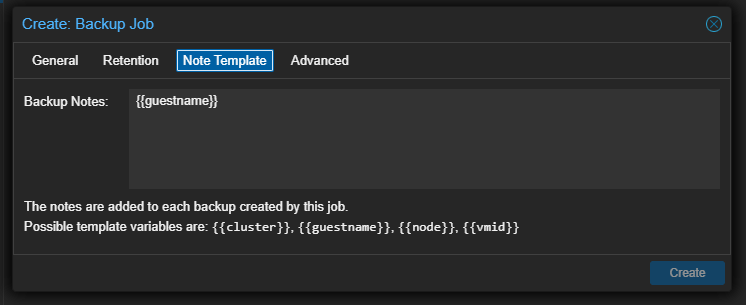
Under Node Template, you can specify notes for each backup. As seen below, you can use template variables to differentiate between each backup.
Once finished, hit create. Your backup job will run on the schedule chosen and all success/failure notifications will be sent to the email specified.
Create a Backup Job (Linux)
Before You Start
Proxmox Backup Client Installed (Instructions to Install Proxmox Backup Client)
Onboarding email with PBS hostname, encryption key, fingerprint, username and password
Steps
Login to the PBS server to save your credentials for this session. Shared users, the datastore is the same as your username and dedicated users, the datastore is named zpool1.
proxmox-backup-client login --repository [username]@pbs@[server]:[datastore]Once entered, you'll be asked for your password.
The commands to run backups are as follows:
Backup Entire System
proxmox-backup-client backup root.pxar:/ --repository [username]@pbs@[server]:[datastore]Backup Specific Paths
proxmox-backup-client backup root.pxar:[path/to/backup] \
  --repository [username]@pbs@[server]:[datastore]
  --keyfile /path/to/encryption/file.key
To run as a scheduled job, you can run the commands as a scheduled cron job. If you would like to exclude any files from being backed up, use the --exclude tag to specify any paths or files.
To confirm the backups were sent, run the following command:
proxmox-backup-client snapshot list --repository [username]@pbs@[server]:[datastore]Restoring Your Backups
Restoring a Backup to Proxmox VE
With Proxmox VE, you can restore a full machine/container or specific files on a machine/container. Both methods are listed below.
Full Disk Restore
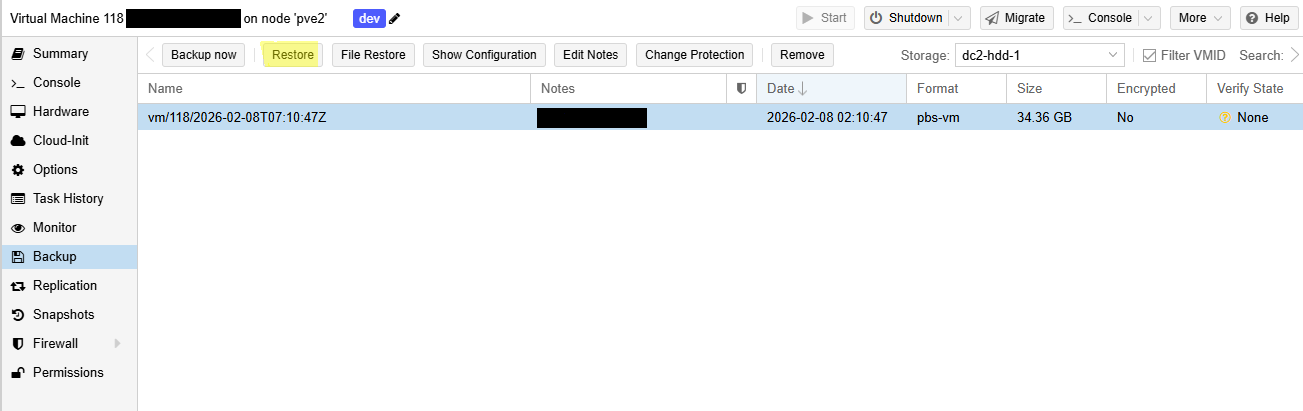
To restore an entire virtual machine or container, select Restore.
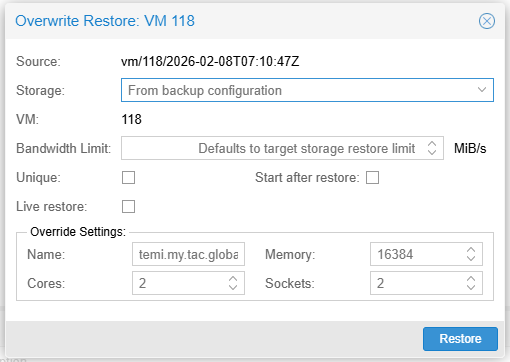
You will be prompted with the following. If there is a virtual machine or container with the same ID it will be overwritten once you select Restore.
File Restore
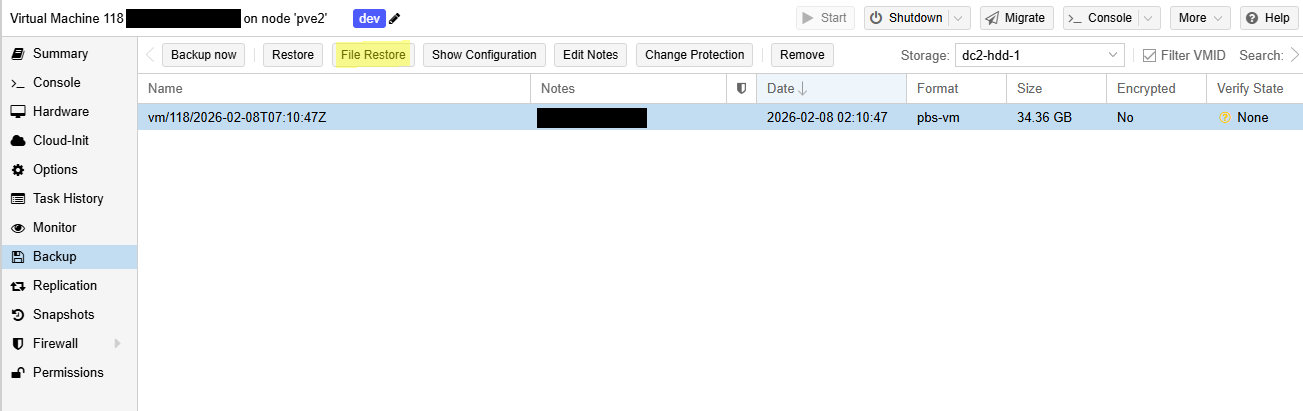
To restore a file, select the virtual machine or container you would like and select the Backup tab. Select File Restore.
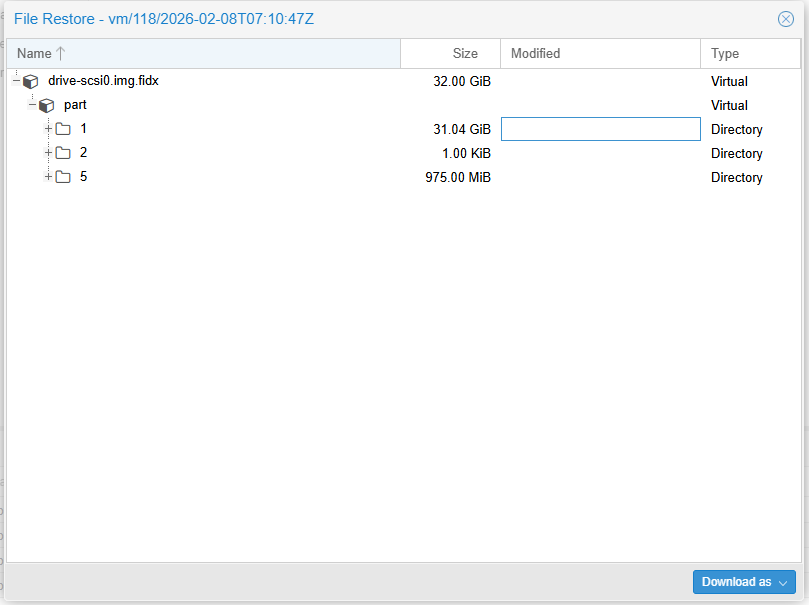
Under the backup archive, please select the file(s) you would like to restore. Select Download.
Restore a Backup to a Linux Server
First, ensure that you have the encryption key file ready to go. If you have forgotten it, please check your onboarding email or the dashboard to recover your key.
To connect to the backup server repository, login with the following command. You will be prompted to enter your password.
proxmox-backup-client login --repository [username]@pbs@[server]:[datastore]Once you have successfully logged in, run the following command to see your backup snapshots.
proxmox-backup-client snapshot listTo restore your selected files you can use the following command
proxmox-backup-client restore [host/example/2026-01-30T23:06:35Z] index.json --repository "" --keyfile /path/to/keyfileHow to Remove Backups
To remove backups from Proxmox VE, navigate to the virtual machine or container you would like to remove. Once you are there, go to the backup tab. You should see the list of backups for your vm.
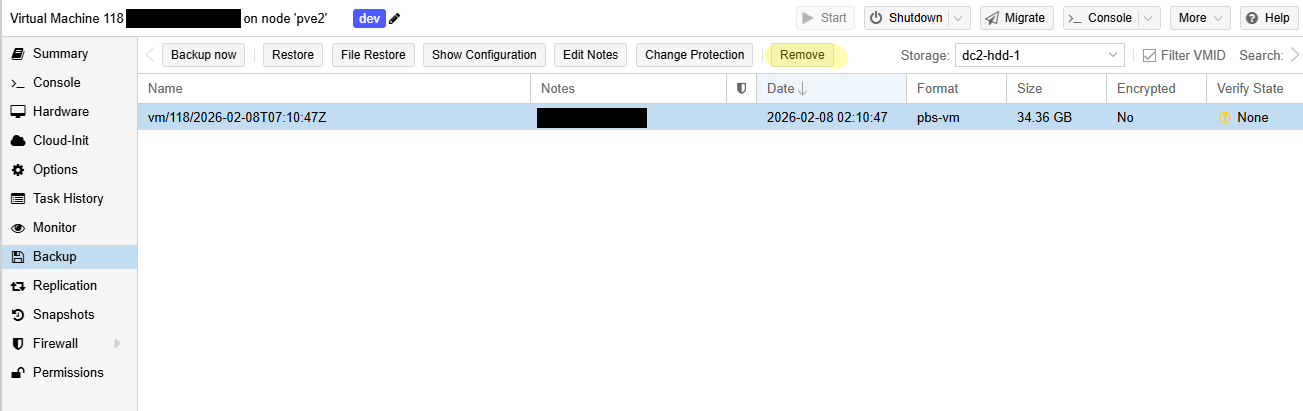
Select the backup you would like to remove and select the remove button.
Pruning allows you to specify which backup snapshots you want to keep and which ones you'd like to remove. To prune a single backup, within your Proxmox backup server account's datastore navigate to the snapshot you'd like to prune. Pruning keeps your backups in a recycle bin, to truly remove it you will have to run garbage collection.

You can schedule pruning jobs under the Prune & GC Jobs under your datastore.
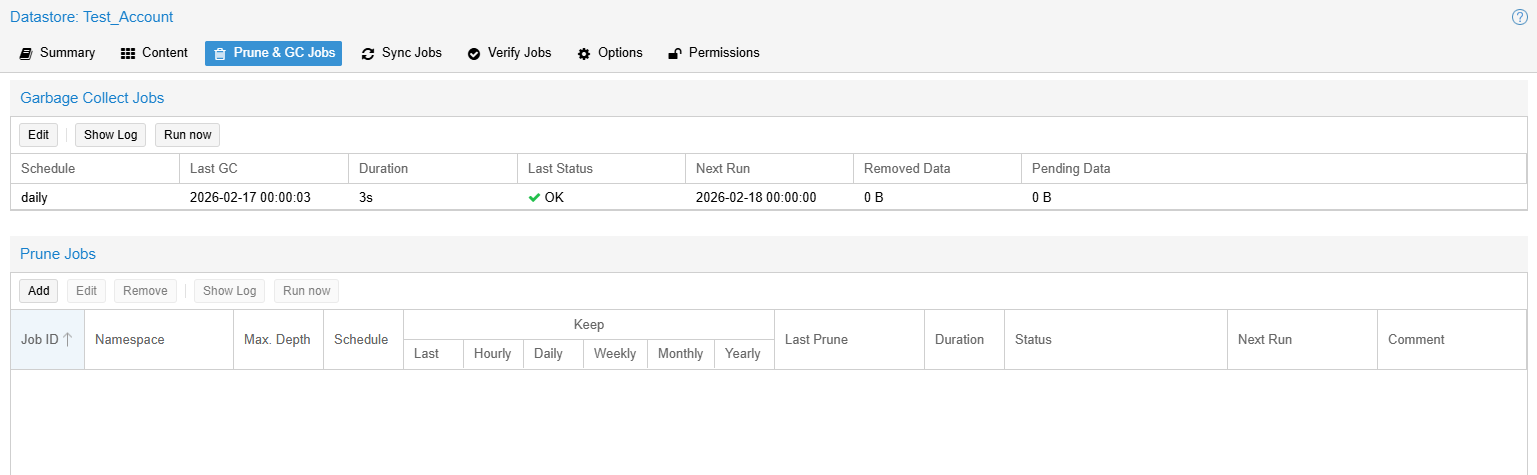
You can add a new prune job, for details on how to set up your prune job, please refer to Proxmox's Official Documentation
If you'd like to skip the pruning step, you can go ahead and permanently delete the snapshot as well.
